

Make decorative paper ornaments for Christmas!
THIS IS WHAT YOU NEED: - scissors
– pinches
– RX glue
– false bones
– string
– pencil
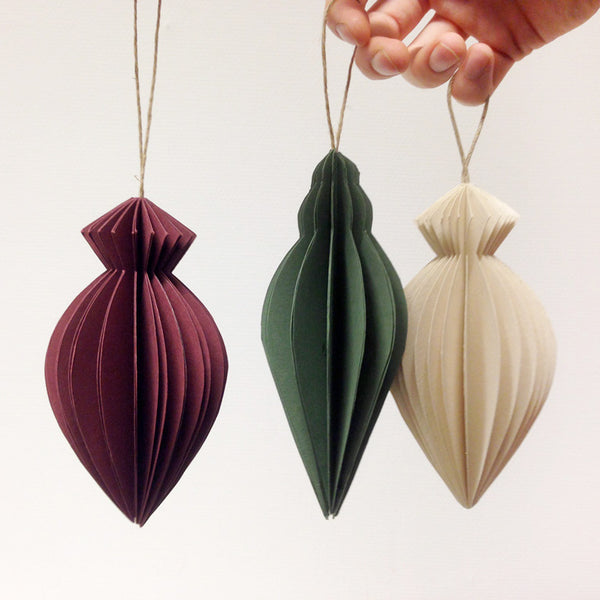
– template (if you want to make shapes like the one in the picture)
- paper cut to double the width of the template, approx. 200gr. Remember to cut with the direction of the grain, then it will be easier and prettier boards. (If you are unsure which way the fibers lie, you can test by bending the paper both ways; the easiest way to bend is the right one)
Approach
Step 1: Print this template on an A4 sheet, and cut out with scissors. Choose the shape you want to start with, and cut the paper you want to make the ornaments with to about the same height and twice the width of the template. Optionally, you can cut to the format 10x20cm, as all the shapes fit it. In the picture, we have used 12 sheets to make the ornament, but you can also use more or fewer. Remember to check the fiber direction before you cut all the sheets!
Step 2: Fold all 12 sheets in half lengthwise. Feel free to use a seam allowance to get a sharp, fine edge.


Step 3: Place the template you have cut out edge to edge with the board, and draw up. (the straight edge of the template, against the folded edge of the paper.)


Step 4: Cut out all the shapes as accurately as possible for the best end result. 
Step 5: Glue along the edge of one shape and attach side to side with the next shape. 


Step 6: Repeat step 5 until you have glued all the shapes together. It pays to do this quite quickly, so that you have the opportunity to adjust so that everyone lies just before the glue dries. 

Step 7: Fasten with clips along the edge so that the shapes stay in place while the glue dries. At the same time, you can glue the string you want to use to the edge. Feel free to attach a clip over this as well (not right up to the glue). While the glue is drying, you can start on a new ornament, for example. 

Step 8: When the glue has dried (about 30 minutes), you can remove the clips and glue the last two sides together. 

Step 9: Put on clips and let dry again. When the glue is dry, you can adjust the sides so that there are even spaces. 
Then all you have to do is decorate for Christmas! Remember that you can experiment with colours, shapes, sizes and paper qualities, don't let your imagination stop you! Hang them on the Christmas tree, in the window, or give them away as gifts.

