

In collaboration with Stefan Papir, we start the Christmas decorations with this simple paper star. If you want to finish everything by Christmas, it is good to be out in good time.
The star fits perfectly as a star on top of the Christmas tree, but can also be used as a decoration in, for example, the window.
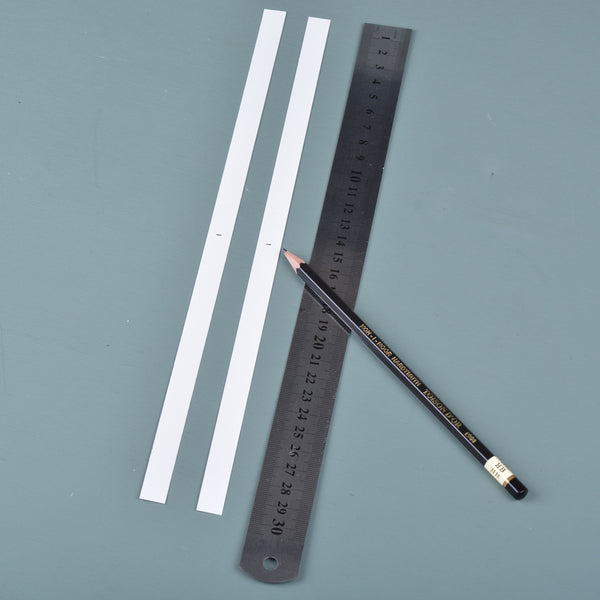
YOU NEED
- 12 strips of paper in the size 1 x 30 cm
- double-sided tape (small squares)
- ruler, pencil and scissors
The recipe is borrowed from The Gentle Journal , and here you will also find a slightly more challenging variant with 20 strips if you want to try it.
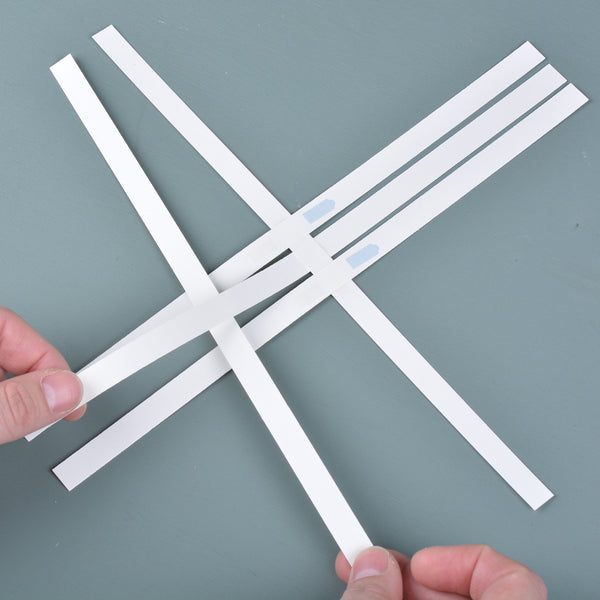
STEP 1: MARK PAPER STRIPS
Start by marking the center of two of the strips. 15 cm from the tip and 0.5 cm from the side. Then place a double-sided tape over the marking on the first strip. Place/glue the second strip so that it is at a 90 degree angle to the first strip. Try to place the markings right on top of each other.


STEP 2: BRAIDE STRIPS
Then put double-sided tape on each side of the first strip (the second strip should overlap the first). Then glue a strip on either side of the first strip, but now they will overlap the second strip. Place them parallel to the first, but leave a space of 5 mm between the strips.


STEP 3: BRAIDE MORE STRIPS
Then place 4 pieces of double-sided tape on the third and fourth strips on either side of the second strip. Then place the fifth strip parallel to the second strip, but above the third, below the first and above the fourth strip. In this way, you braid the strip in the opposite way to the other strip. Then place/glue the sixth strip on the opposite side of the second strip. Now also over the third, under the first and over the fourth strip. Remember to leave a space of 5 mm between the strips.

STEP 4: MAKE FOUR LOOPS
Then bend around the last strip from one corner and the first strip from the next corner, and glue the right strip so that it overlaps the left one at a 90 degree angle. Repeat this on all four corners. Tip: Apply double-sided tape to the tip of all the first strips before bending around.


STEP 5: MAKE TWO HALF PARTS
Make two such halves to make a star. Then place the first half upside down on the table. Then place the second half on top of the first, but so that the loops are placed directly over the middle strips in all corners. 


STEP 6: GLUE CENTER STRIPS
Then push all center strips into the loop on the opposite side. Four strips on each side of the star. Then put double-sided tape on the tip of a loop and glue the middle strip to the tip of the loop. The middle strip should protrude a couple of cm on the outside of the loop below. Repeat on all eight loops. Feel free to turn the star around to glue together more easily.


STEP 7: ANGLE CUT ALL TIPS
Follow the tip shape of the loop and then cut off the tip of a middle strip. Repeat on all tips. Then your star is done!


